Order of Play is a court scheduling system inside the Event Desk that replaces traditional fixed-time scheduling and manual spreadsheets with a visual, drag-and-drop court grid.
Instead of assigning matches to exact start times, organizers can sequence matches so each court continues running efficiently, starting the next match as soon as the previous one finishes. This system is designed for tournament directors running events of all sizes, from club tournaments to large-scale competitions and Pro Tennis Tour (PTT) events.
Date an event and want to add a Provider? No problem! Providers can see both current and future unpublished events.
Getting Started
To begin using Order of Play, the following setup steps must be completed in the Event Desk:
- Select “Order of Play” as the schedule type when creating the event
- Ensure all courts and facilities are properly configured in your club page and event setup
- Optional: Configure SMS notifications to alert players when their match goes on court or when scores are posted
- When first accessing the scheduler, define the day parameters, including:
- Match start
- Daily operating duration
- Time increments (e.g., 5, 10, 15, or 30-minute blocks)
Step 1: When entering the Event Desk, select Order of Play as the Schedule Type.
Note: The schedule type can be changed at any time via Manage > Schedule Type. However, switching between Order of Play and Match Sheet clears any existing schedule (including scheduled times), so it's best to choose your best event-setting method before building your schedule.
Step 2: In the create draw settings, set the default allotted scoring time. Different default times can be used for different parts of the draw. For example, 75 minutes for the main draw and 60 minutes for the backdraw. These will impact the length of match cards on your schedule grid.
 Configuring the Court Grid
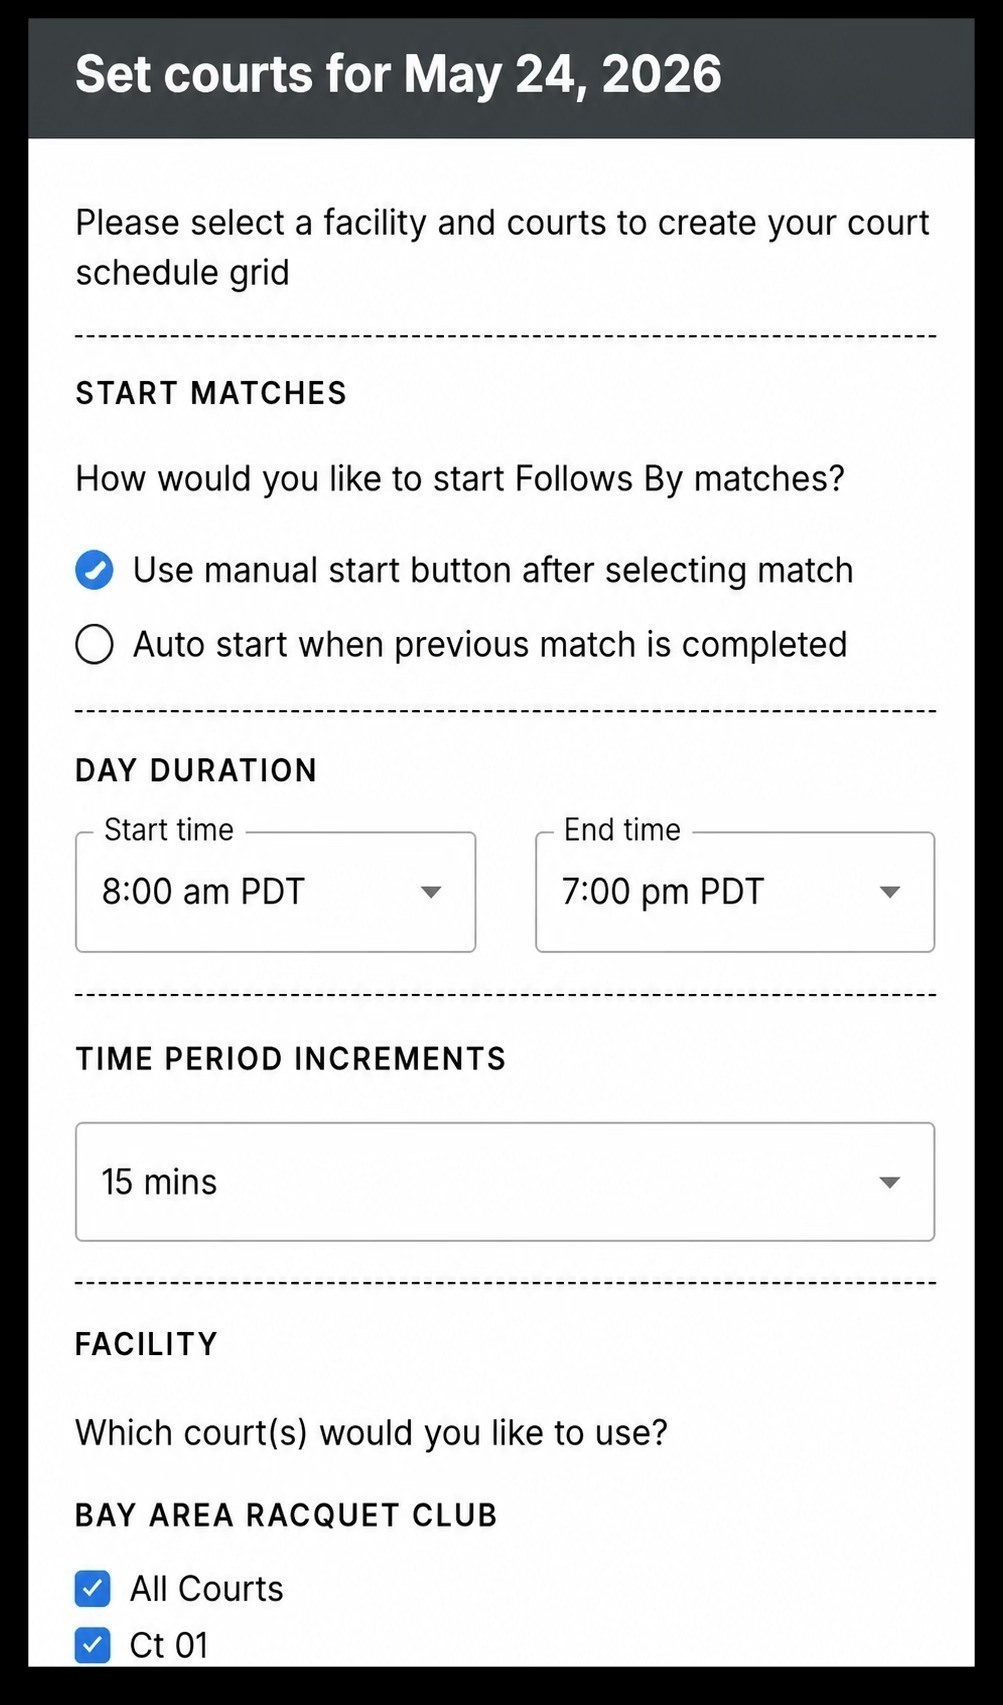
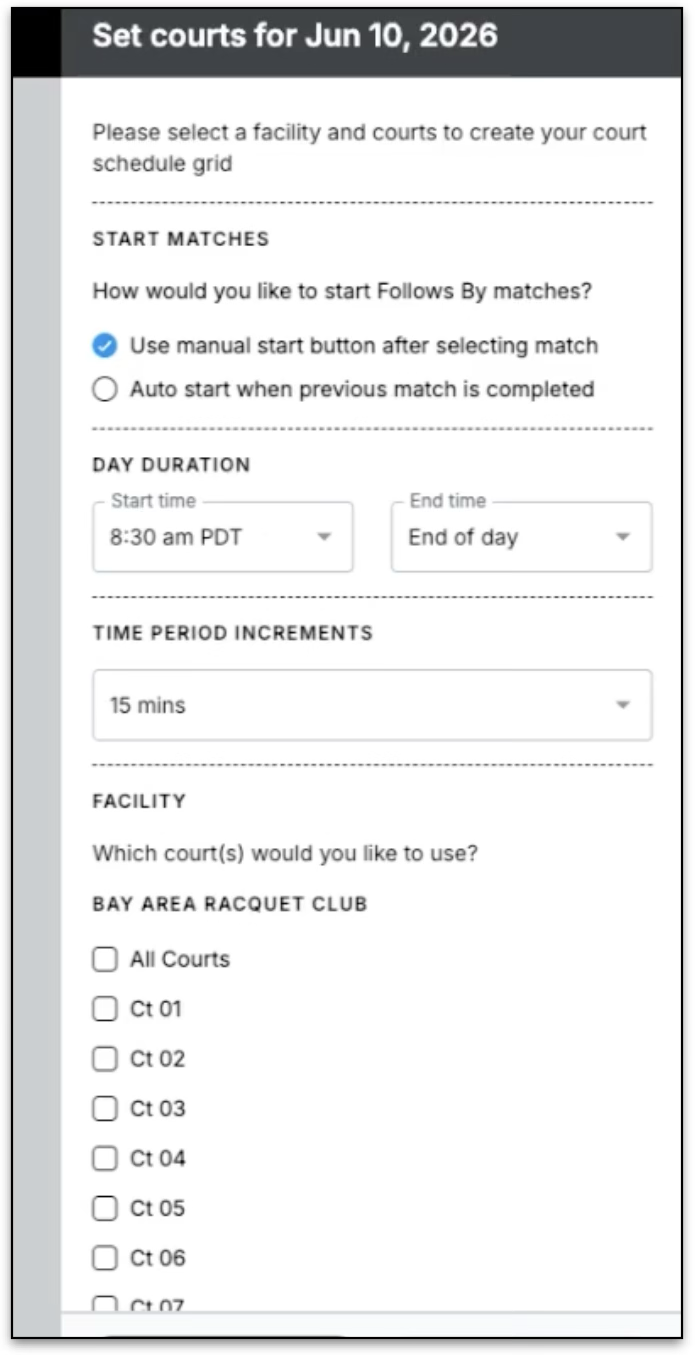
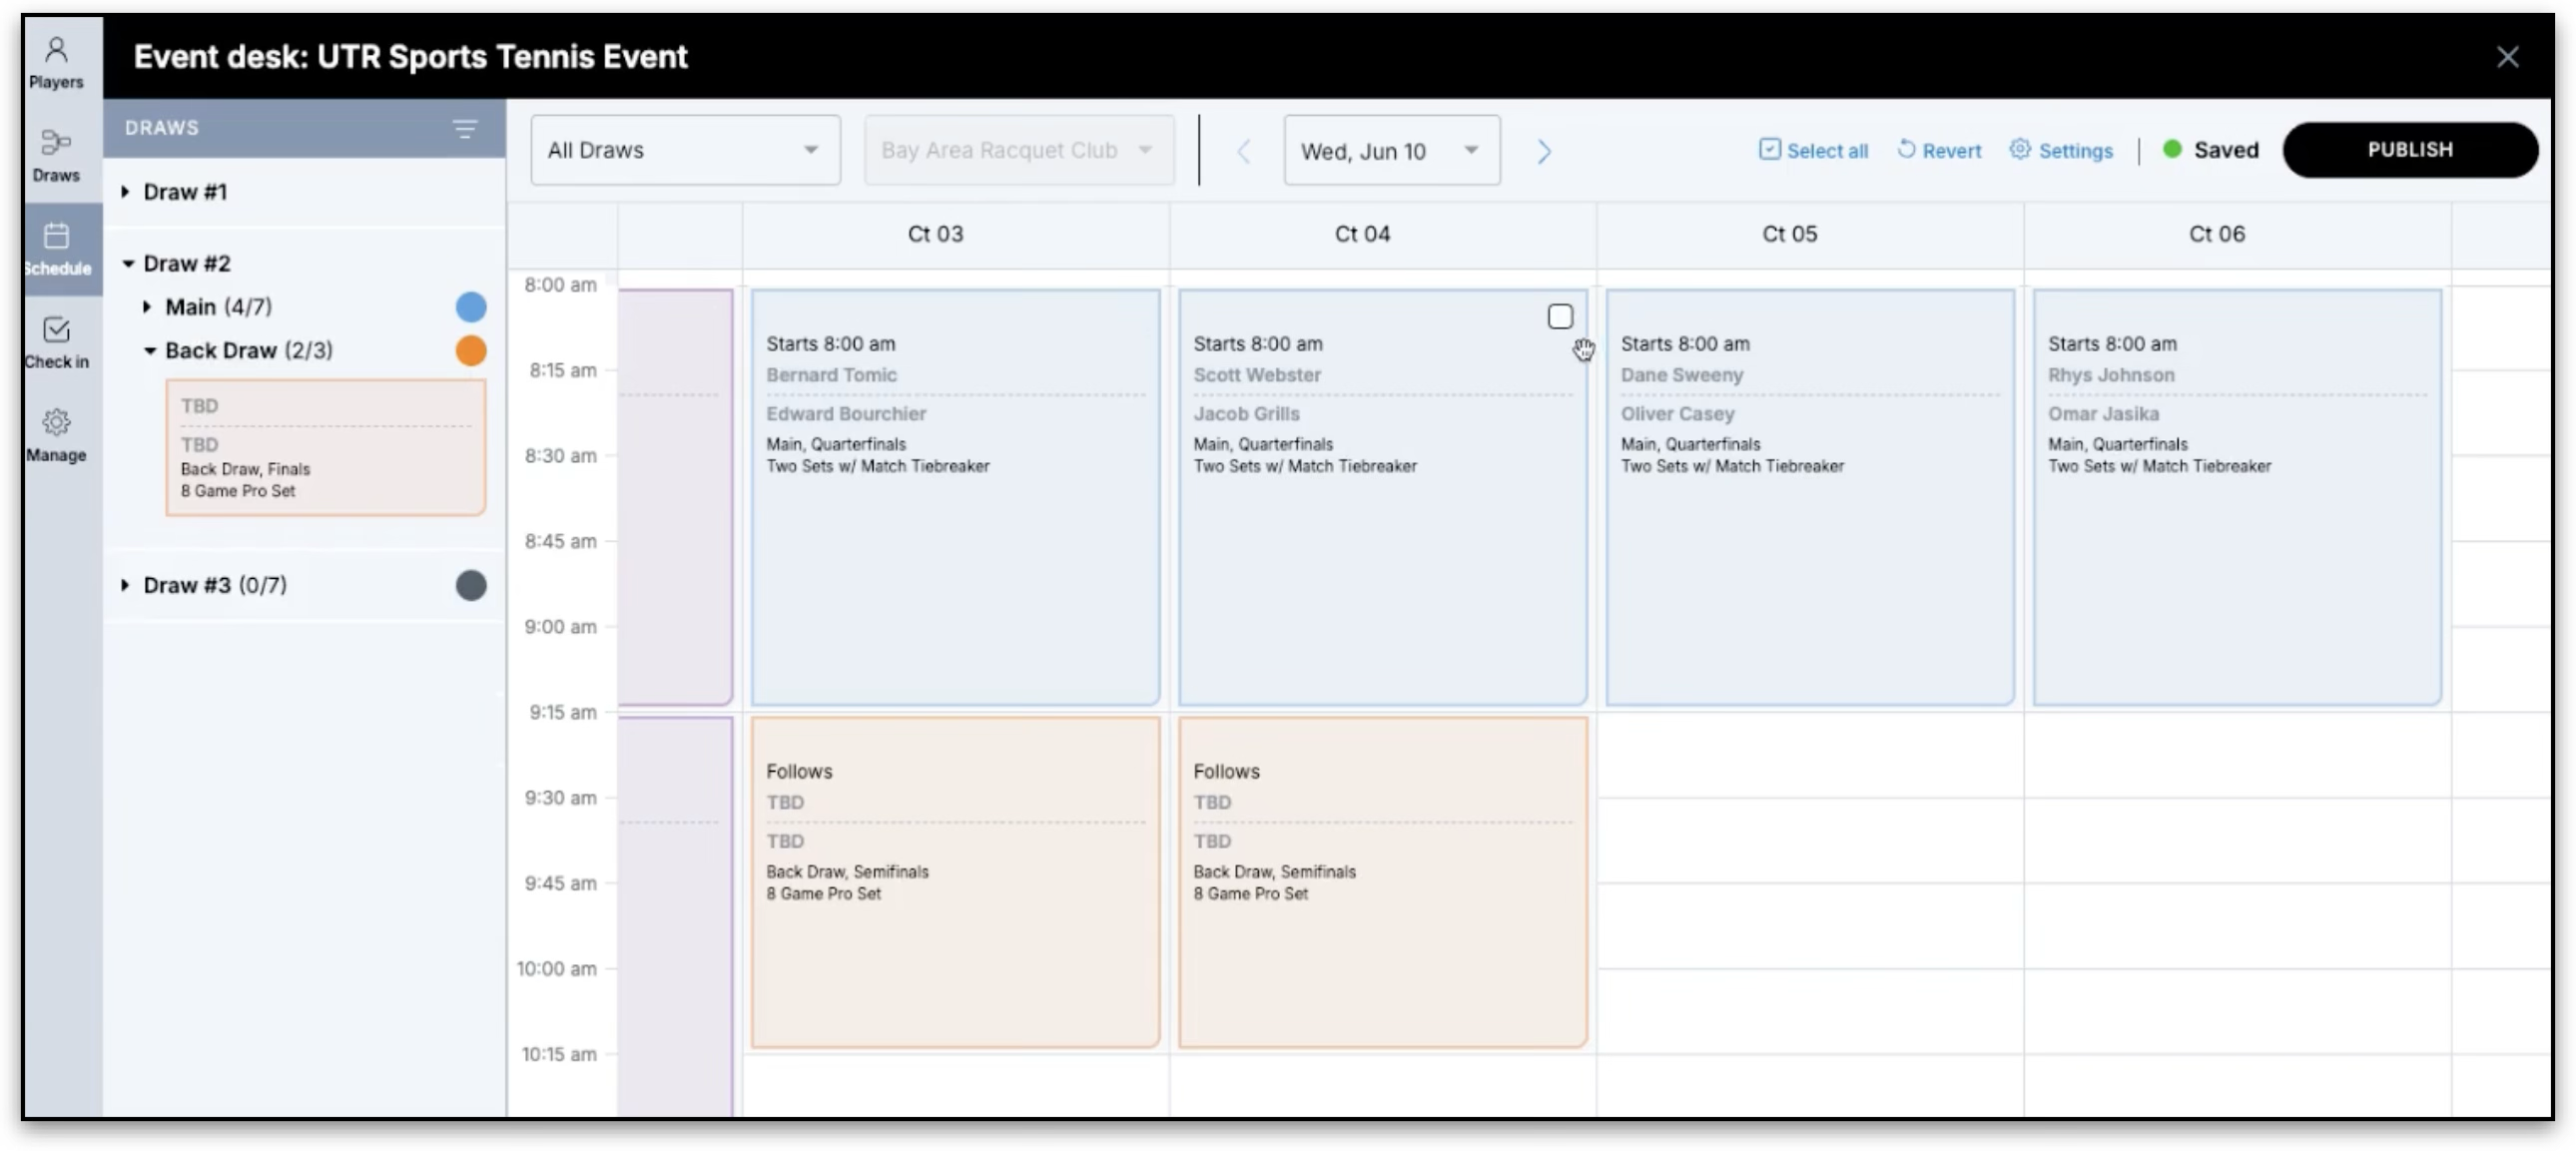
Step 1: Open the Schedule page by clicking on the schedule icon to begin building the court grid. Configure the court grid: set start match behavior, day duration, time period increments, and select your facility and courts. Click Set Courts when ready.
Step 2: The court grid is generated and ready. Courts display across the top; time runs down the left side. You will also see days of the week and settings access at the top, and draws / matches on the left side bar.
Scheduling Matches
Timing Rule Reference
| Starts At | Default for the first match placed on a court (begins at a specific time) |
| Follow | Start time depends on the completion of the prior match. Default for subsequent court matches |
| Not Before | Match will not begin earlier than the specified time (may still start later) |
| Fixed Time | Match is intended to start at exactly the specified time |
Step 1: Drag and drop a match from the sidebar onto a court and time slot to place it on the grid. Changes auto-save immediately. Scheduling can only be done from the Schedule tab, date, time, and court cannot be assigned from inside draw views.
Matches can be moved to a different time/court position using drag and drop again, or a match can be removed from the grid by selecting the match card and clicking remove at the top.
Timing rules control how matches sequence: Follows keeps the court queue moving automatically; Not Before prevents a match from starting before a set time. Click any match card to change its timing rule.
Tip: If you want players to see an exact scheduled start time for a match while using Order of Play, select the match card and change its timing rule to Fixed Time. This displays the scheduled time on the public event page. This setting must be applied individually to each match.
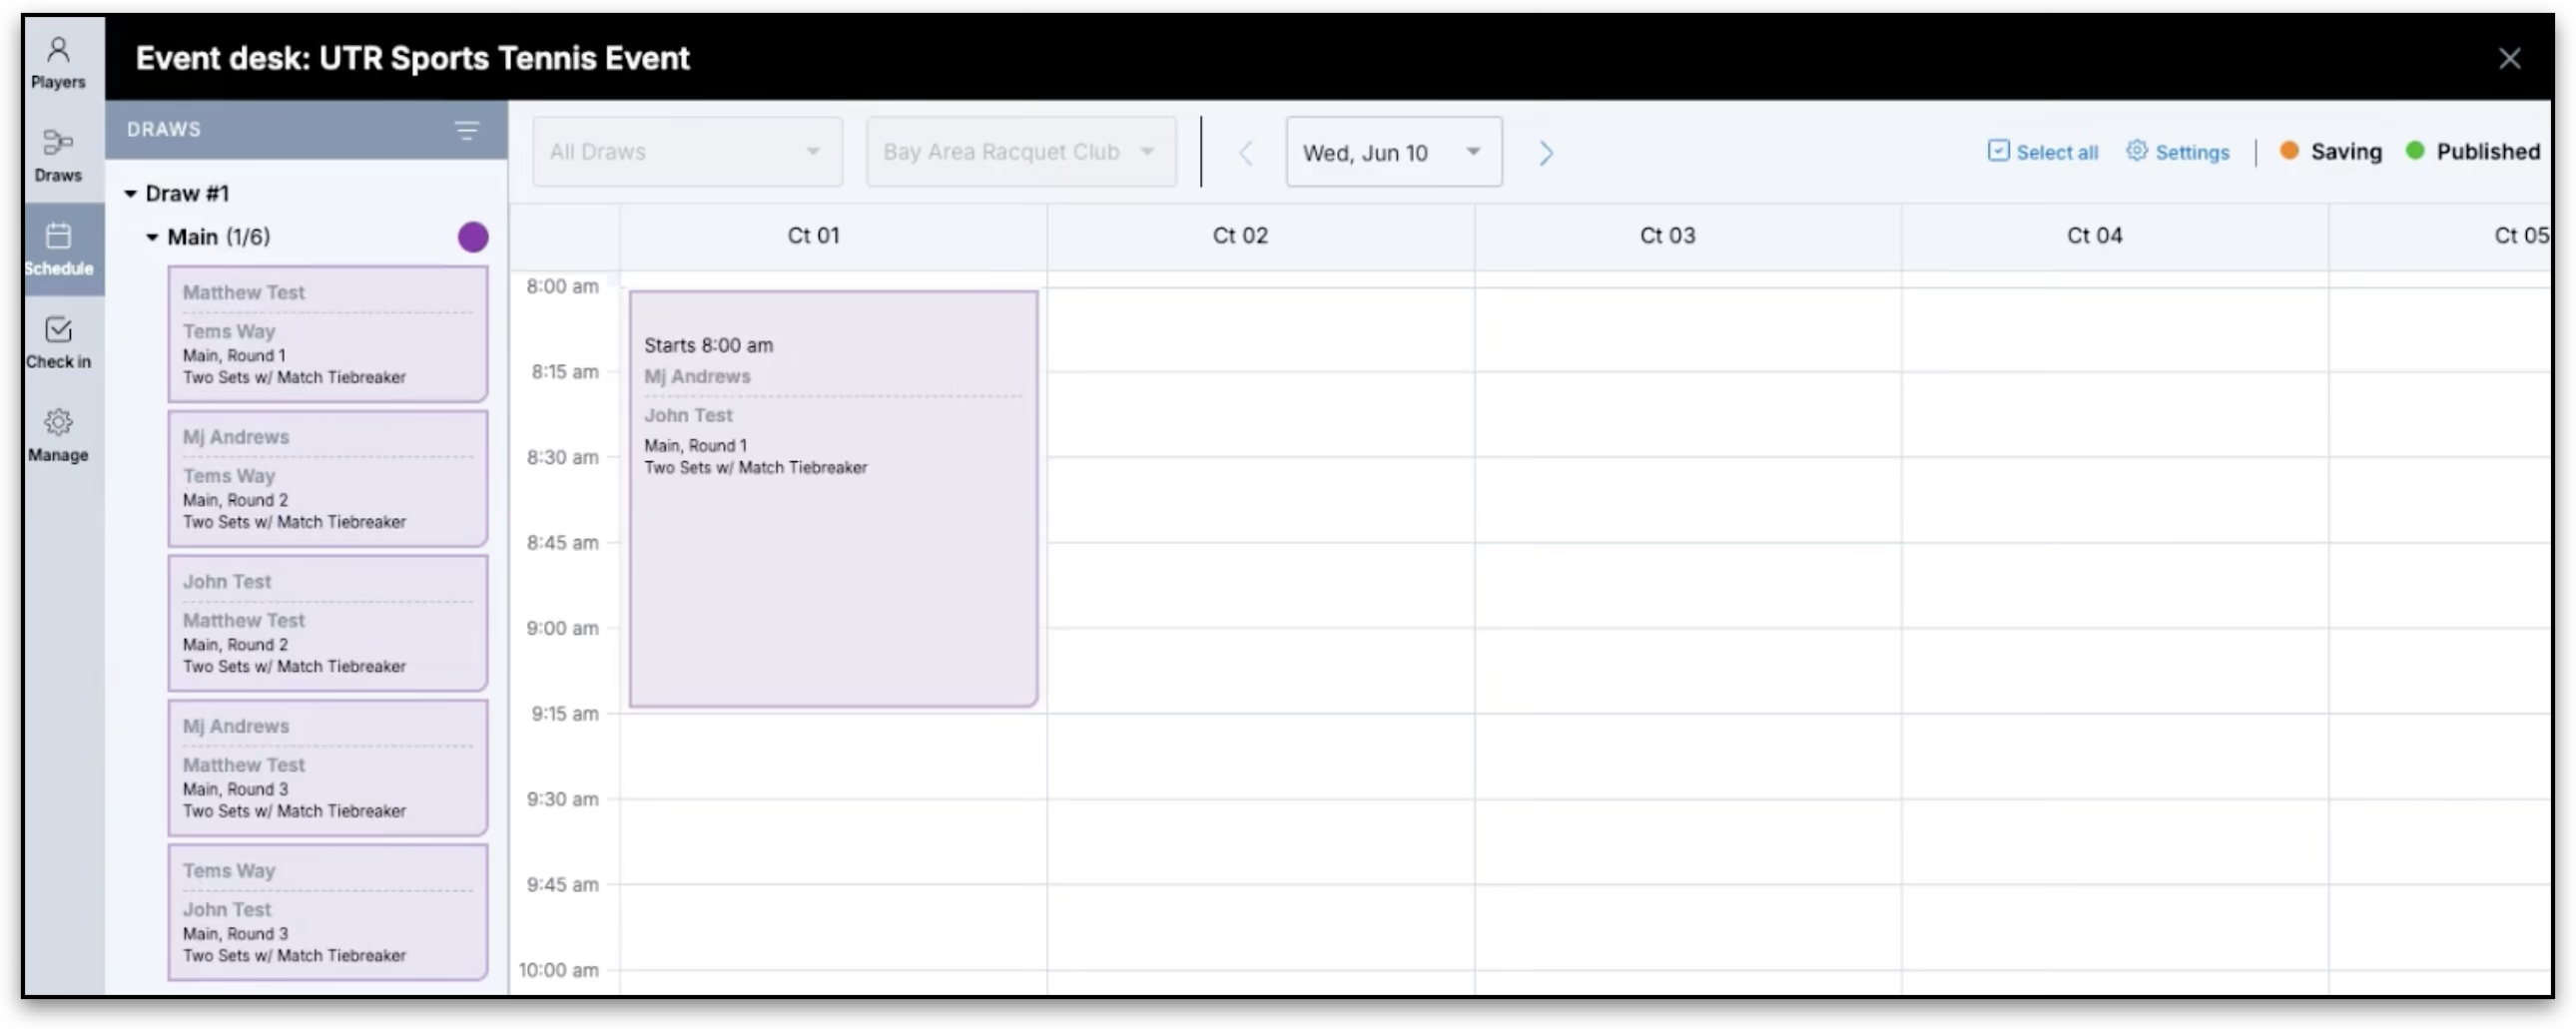
Step 2: A green checkmark in the draws list confirms all matches for that draw have been scheduled.

Step 3: For multi-day events, navigate to the next day and click Set Courts to create that day's grid. Settings default from the prior day but can be adjusted.
Publishing
Step 1: Click Publish. A confirmation pop-up shows which day's schedule you are publishing. Confirm to make it live for players.
Note: Draws must be published for your schedule to be visible on the event profile. If draws are not yet published, you will receive a warning when publishing your schedule.
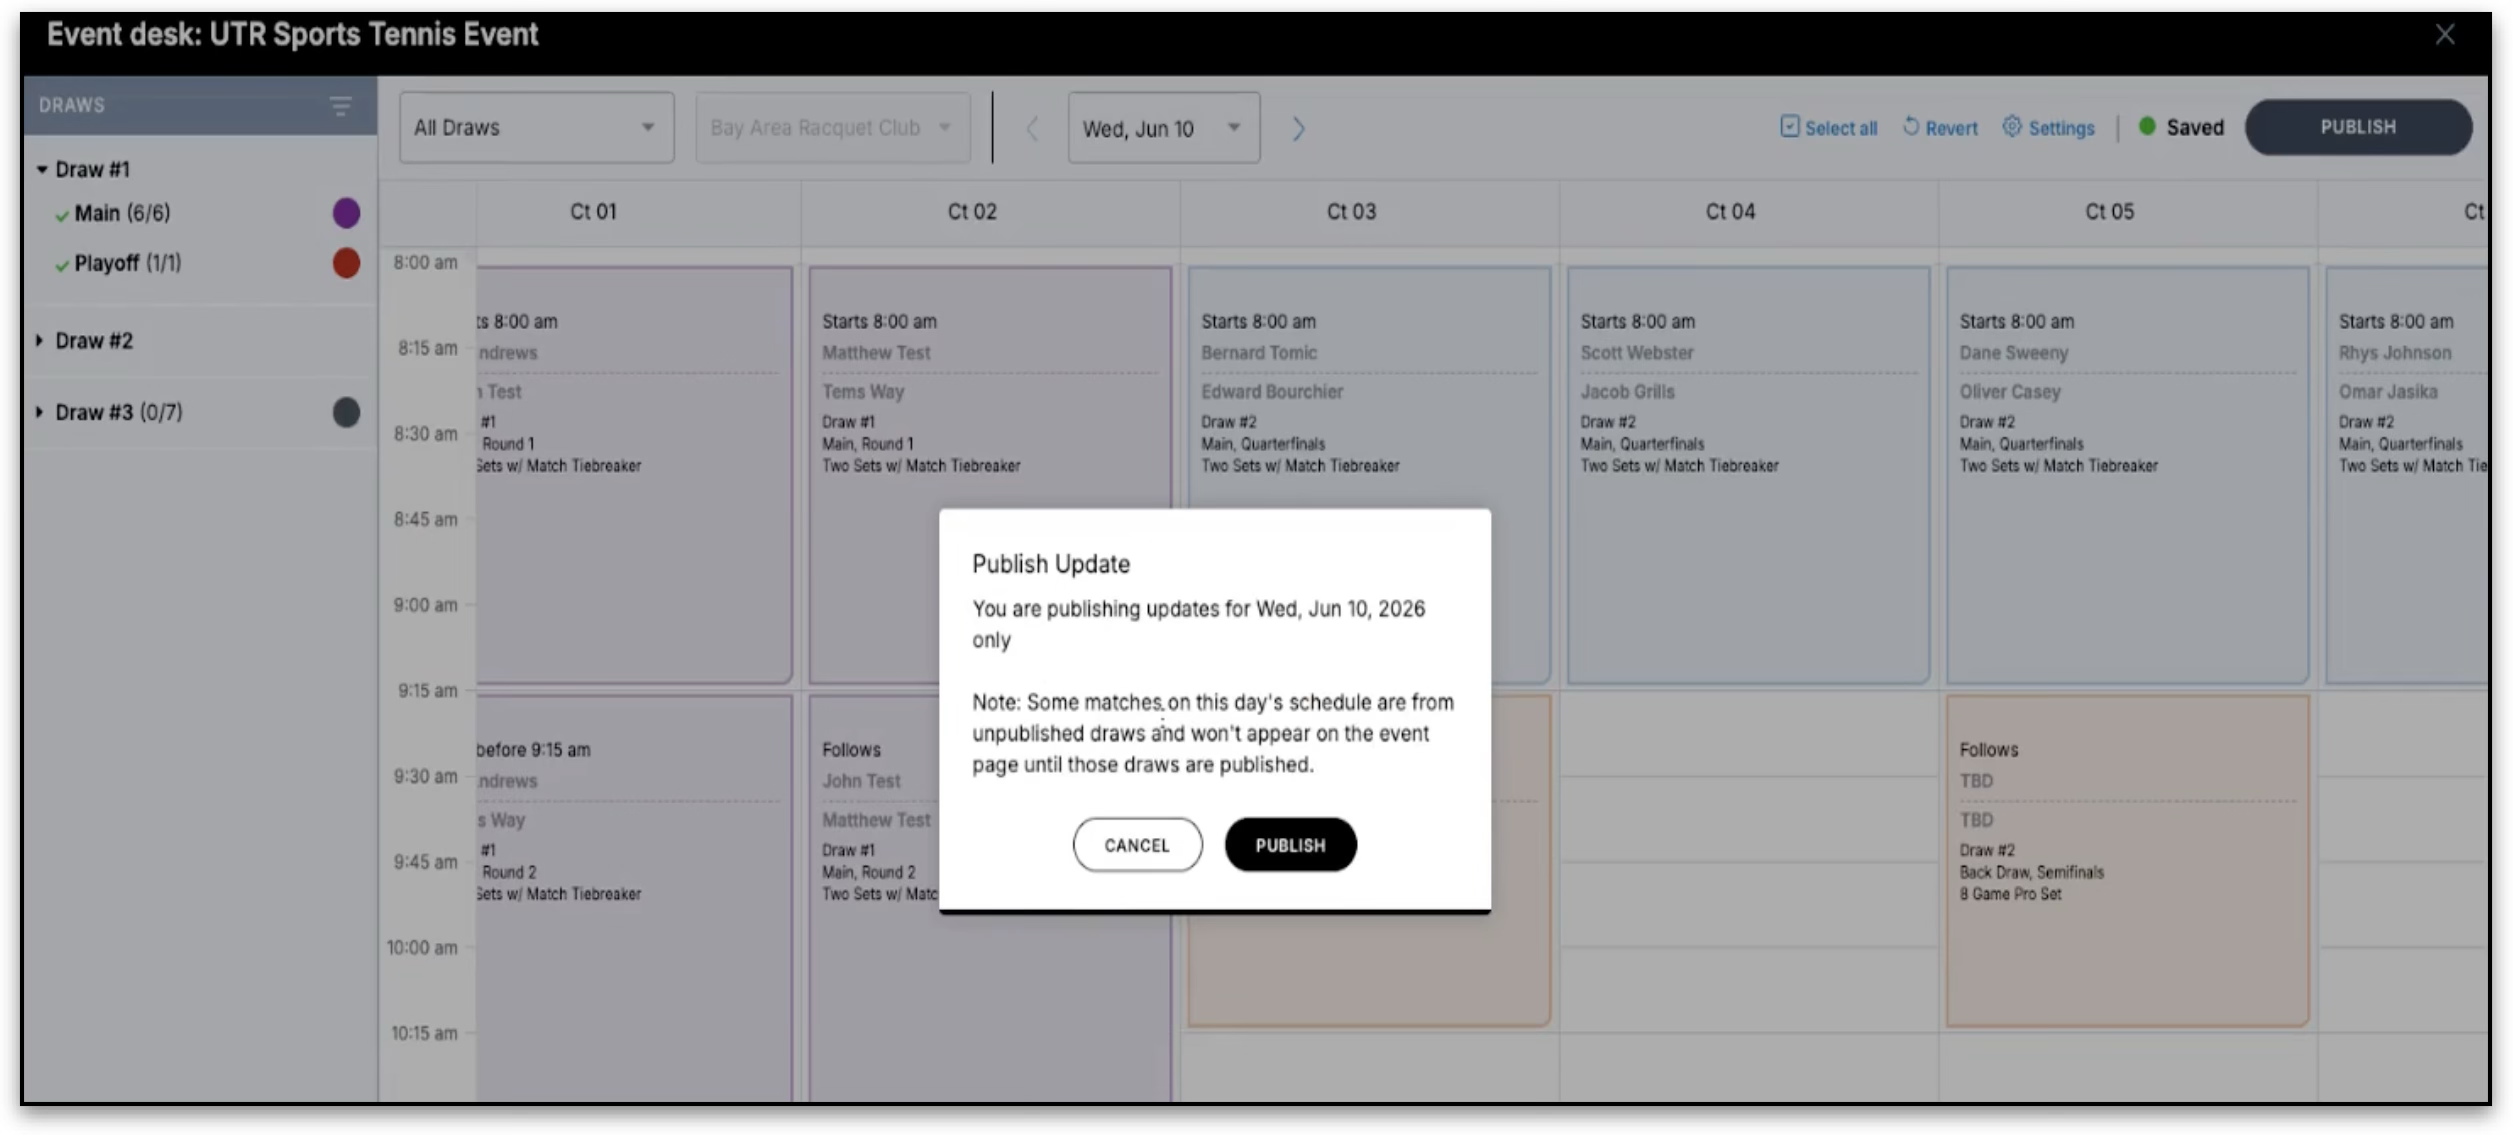
Step 2: Once published, the Publish button changes to a green Published icon showing the last published date and time. If you make further changes after publishing, the Publish button will reappear. Those changes will only be visible to the public after you publish again. Each day must be published individually.
To undo post-publish edits, use Revert to restore the last published state in one action.
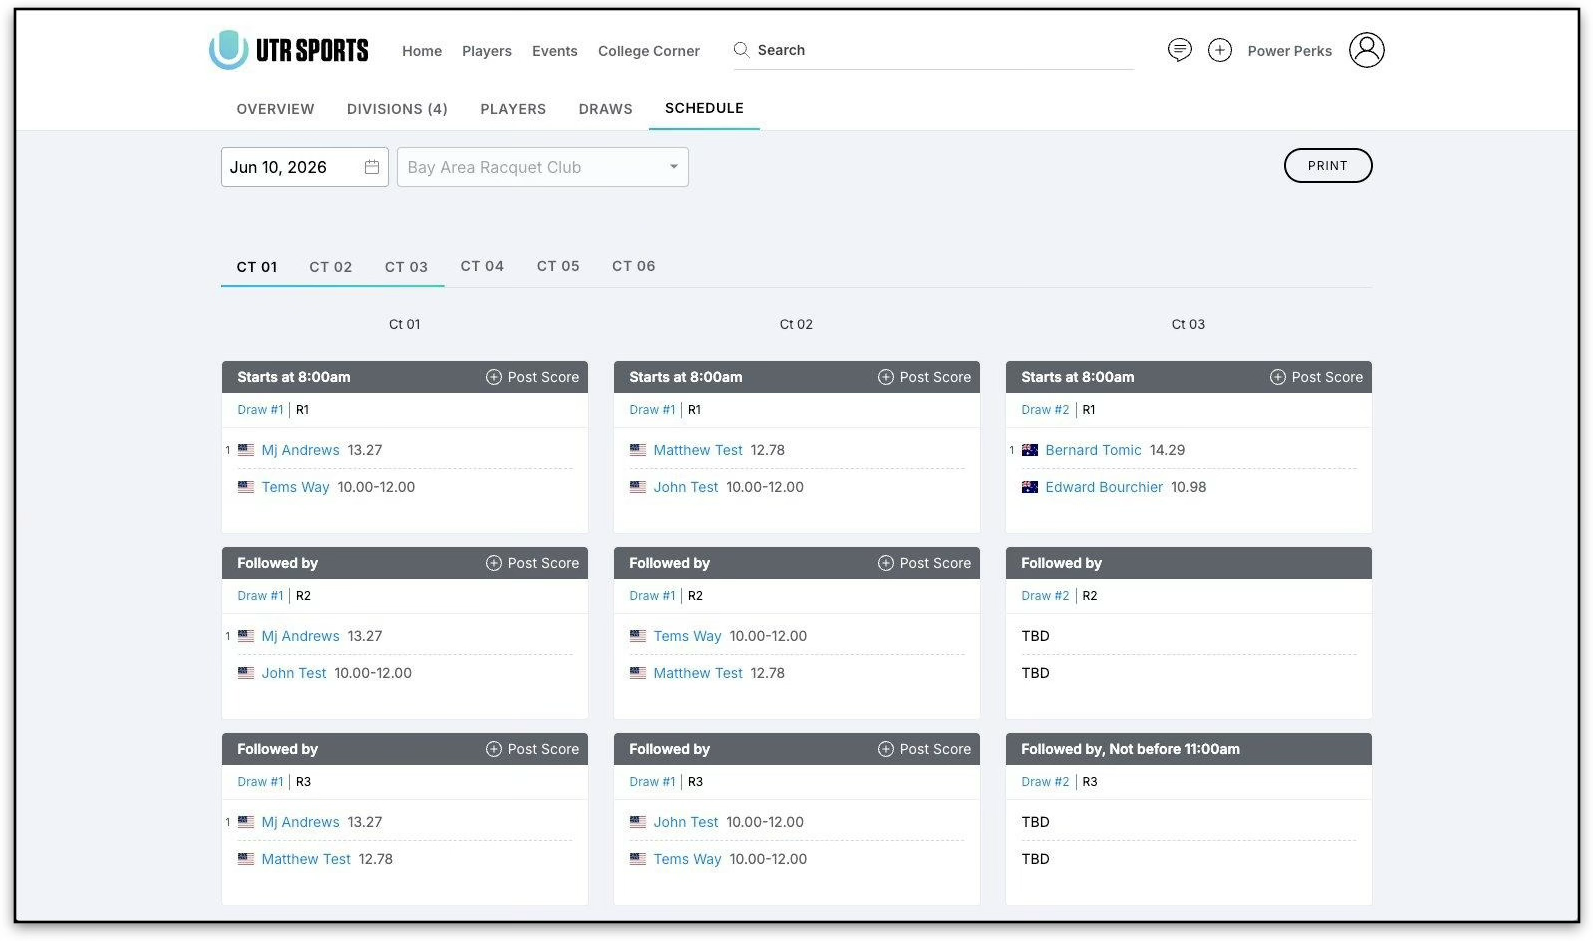
Step 3: Confirm the player-facing Schedule page shows the published courts, match cards, and timing labels correctly. Scores may also be posted directly from here, or the draws tab within the event page or event desk.
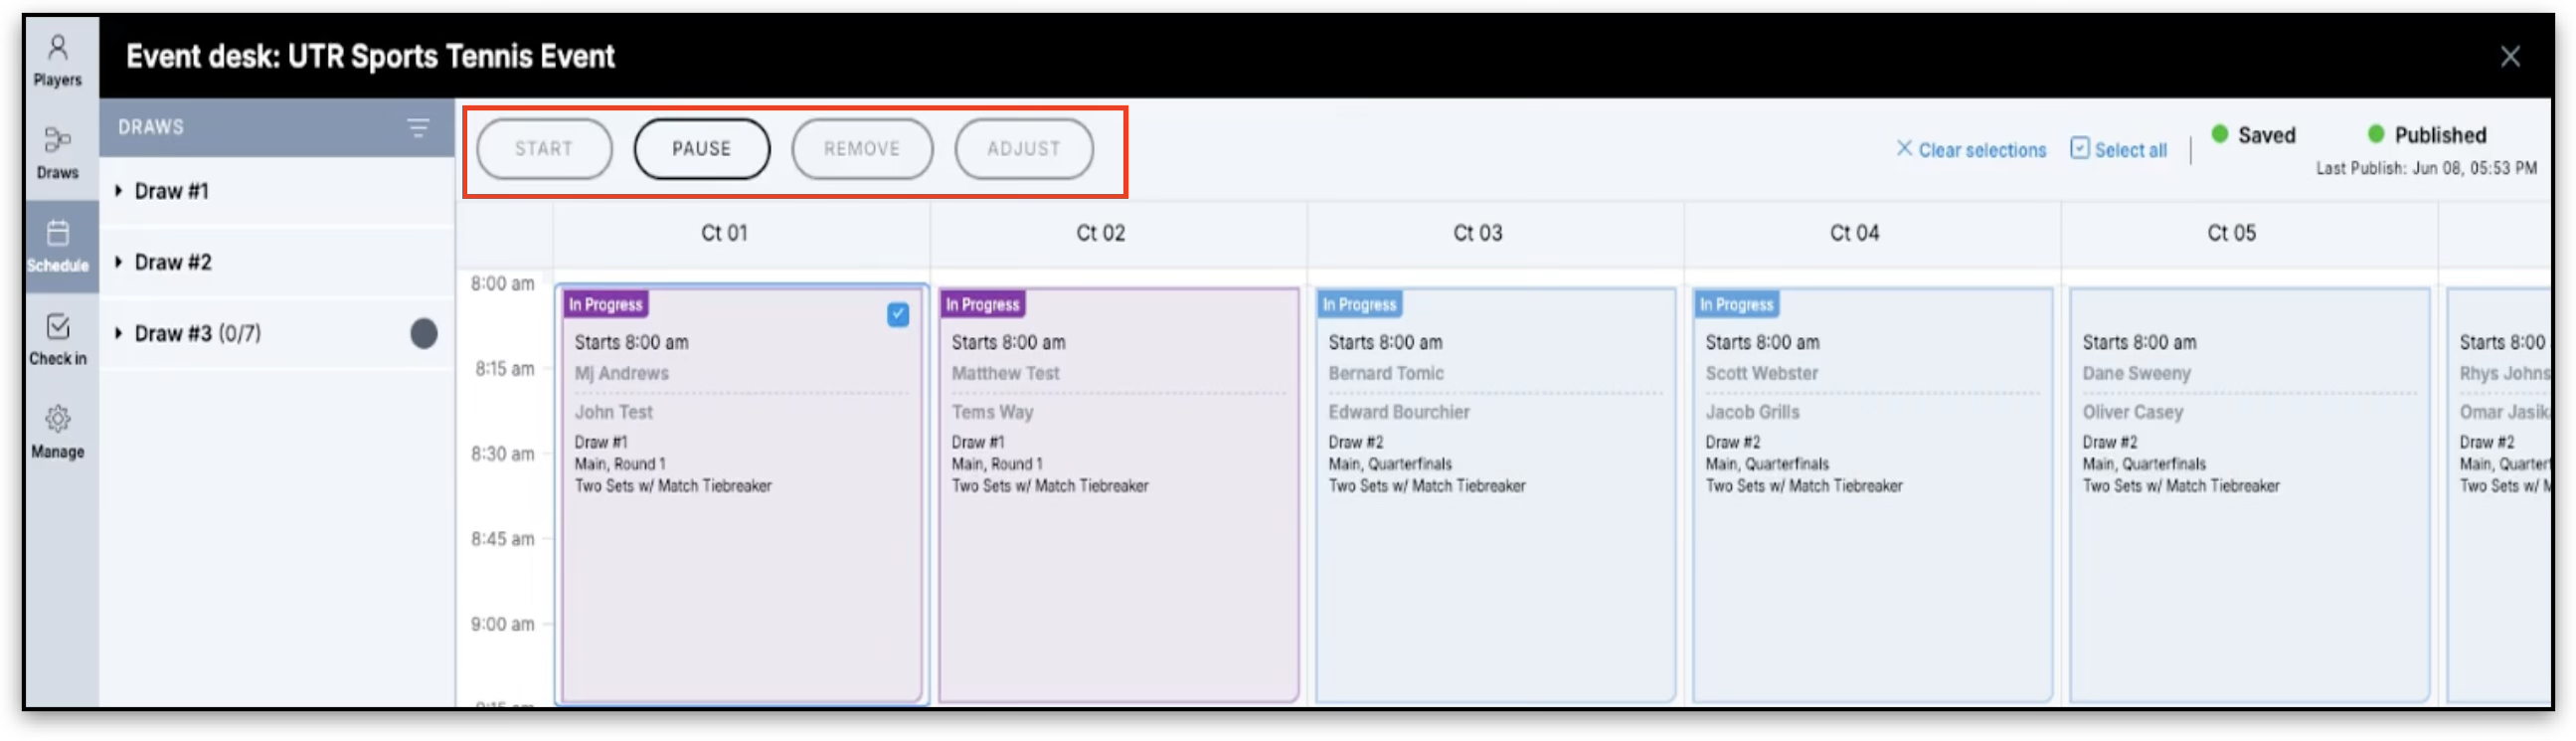
Match Day Operations
Step 1: When ready to begin your day, select match cards and click Start. A confirmation popup appears before matches go In Progress. If SMS notifications are enabled, players are notified automatically.
Note: Match statuses (In Progress, Paused, etc.) are visible to the provider in Event Desk only, and are used for your planning and tracking purposes. You can use the Order of Play scheduler without marking matches as In Progress if preferred.

Step 2: To handle delays, select a match and choose Pause, then use Push Back to shift subsequent matches on that court by a set amount. Publish again to update player-facing times.
Select a paused match and click Play / Resume to return it to In Progress.
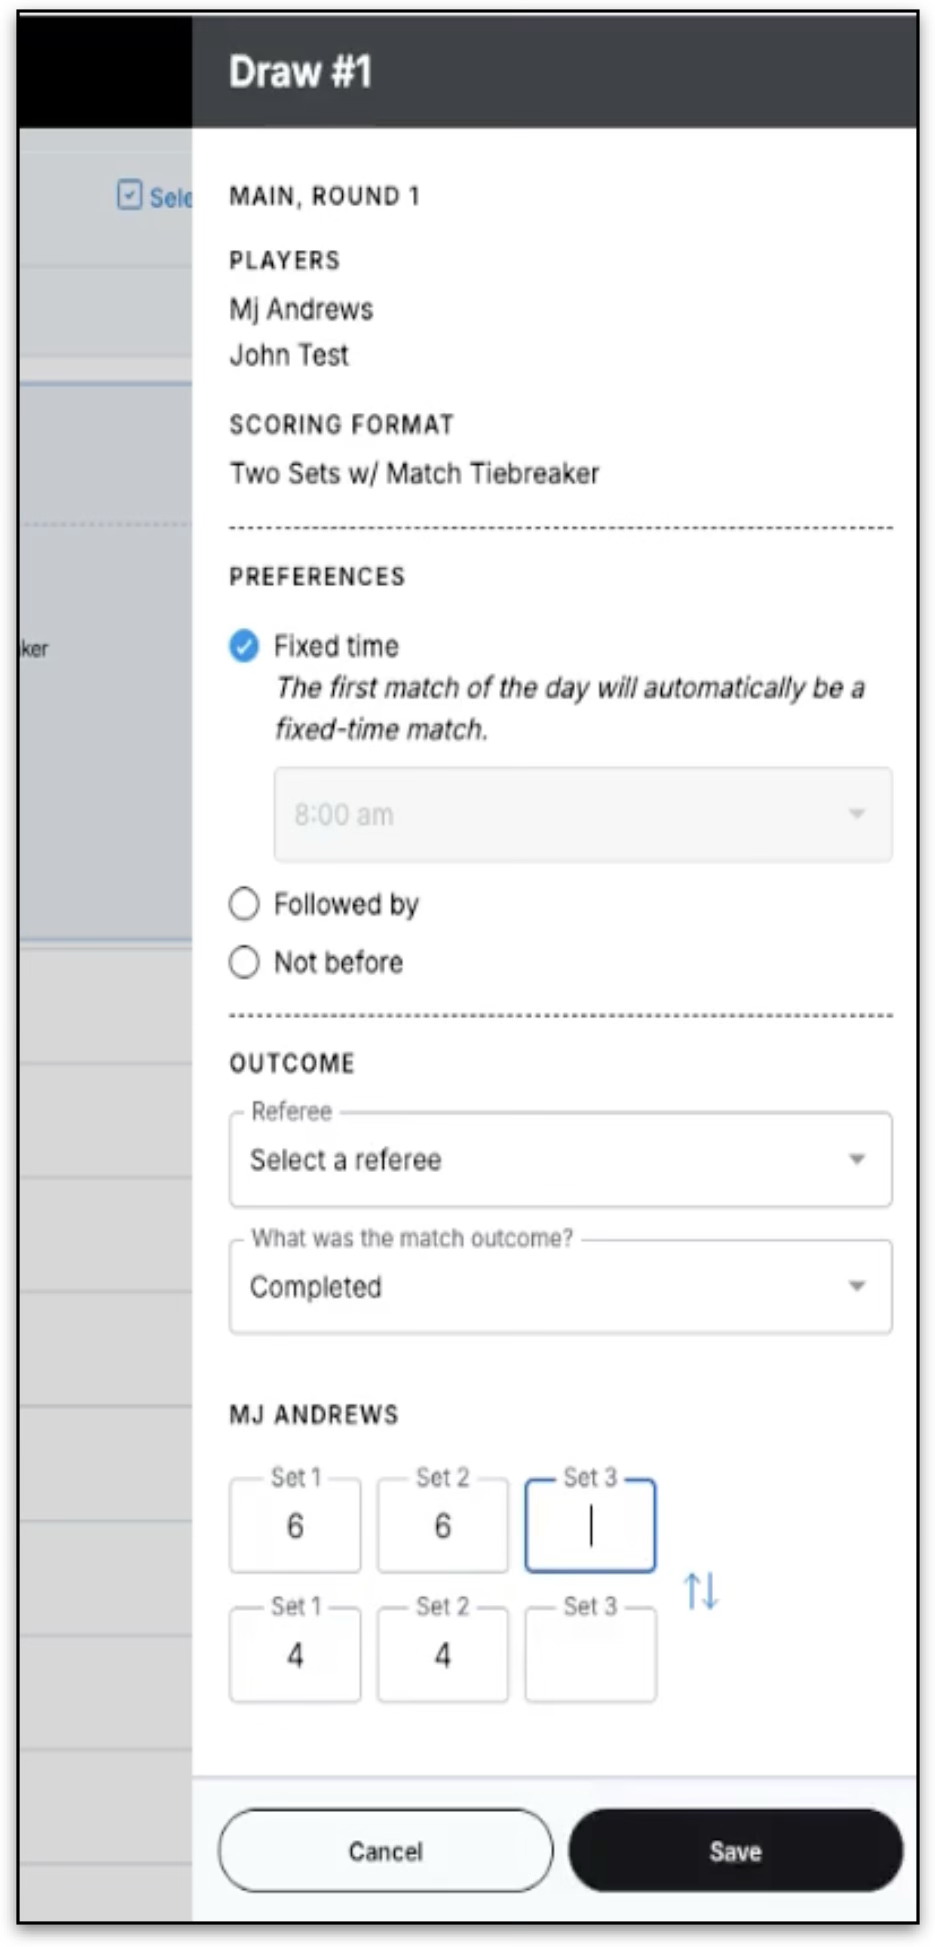
Step 3: Enter results directly from the court grid: select a match card, choose an Outcome, enter the Score, and save to mark the match Completed. Scores posted from the Draws tab or Event Profile will also update on the Order of Play court schedule grid.